Windows Checkra1n Jailbreak iOS 13.7
How to use Checkra1n on Windows PC to jailbreak iOS 13 - iOS 13.7 with BootRa1n utility and USB flash drive.
Checkra1n is a fantastic jailbreak utility! It’s capable of jailbreaking the iPhone X and older FOR LIFE! There’s only one problem: no official Windows support. Initially, checkra1n was released exclusively for macOS. However, since then, the developers have added Linux support. This is great for two reasons. Firstly, it allows a larger non-Windows user-base to jailbreak via the utility. But secondly, and almost more importantly, it enables us to easily jailbreak on Windows. All we need are two things: a custom linux distribution and a flash drive larger than 2GB!
Requirements to Jailbreak on Windows
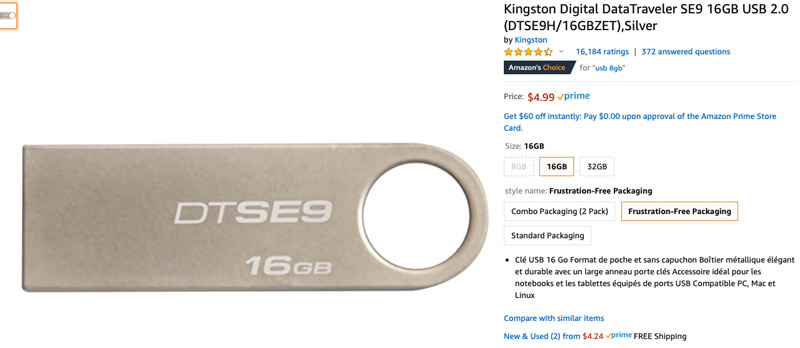
As mentioned above, you’ll need a flash drive of some sort. Due to the current world affairs, that may be easier said than done. However, I’ve found a relatively inexpensive USB 2.0 flash drive that would be perfect for this project. It’s both linked above (click the picture) and right here (click).
[adinserter block=”4″]Beyond that, you simply need the following:
- A Windows-based PC.
- Wired keyboard.
- USB to lightning cable.
- Checkra1n-compatible iOS device.
- A USB flash drive (we’ve already gone over this).
How to Install and Run Bootra1n

Now comes the fun part, installing bootra1n on our USB drive. Downloads can be found below and follow the below steps to get things rolling.
Step 1: Connect your flash drive to your computer and format it. Simply open File Explorer and click “This PC” on the left. Next, under “Devices and Drives”, right click your USB flash drive and select Format. In the pop-up window leave all settings as default, ensure the proper format is selected (FAT32 for flash drives 8GB in size and under or NTFS for larger), and click start. Click “ok” to the ensuing pop-up warning to begin formatting.
Step 2: Launch Rufus and ensure your flash drive is selected. If it’s not, click the drop down and point Rufus at it. Do the same for the bootra1n ISO by clicking the “SELECT” button and pointing the window at bootra1n. Leave all settings at default and click “START”, followed by “OK” to the following two pop-ups.
Note: If after clicking “START” during this step, you receive a message about needing to download two files from the internet for Syslinux, please do so by clicking “Yes”. After that, you can proceed by clicking “OK” to begin the process of wring the ISO to the flash drive.
Step 3: Turn off your PC. Reboot it into your system BIOS; to do this, you’ll have to rapidly push a button on your keyboard during the boot process. This key varies based on your motherboard manufacturer. It’s usually the delete key or a function key. If you’re unclear how to enter BIOS on your machine, refer to this guide that breaks down the keys by manufacturer.
[adinserter block=”5″]Step 4: Find the option within your computer’s BIOS to boot from your flash drive’s UEFI. This option may be buried within your BIOS menus, and its different from machine to machine, so this step is dynamic. Just do some digging and refer to the above video. With patience, you’ll find it easily.
Step 5: When done properly, bootra1n will ask you which version you want to boot to. Select the top option by hitting Enter. If your computer’s keyboard is unresponsive, that’s because you need to use a wired keyboard for these steps; plug one in now.
Step 6: Log in by typing “anon” and press Enter. Next, input the password “voidlinux” and press Enter. At this point, we can now load checkra1n. Type “sudo checkra1n” and press Enter.
NOTE: This is the most IMPORTANT part, you must go to options inside of checkra1n and enable untested versions. This is because checkra1n itself was never updated by the team to include support for firmwares beyond iOS 13.5. However, due to the low-level nature of the bootrom exploit powering checkra1n, it remains possible to jailbreak iOS 13.7 on supported devices using this method.
Congratulations you can now use checkra1n as you normally would to jailbreak iOS 13 on macOS, only we’re doing it on Windows! The steps from here are identical to those found on our dedicated macOS checkra1n tutorial. We plan to update this guide later to include said steps; but for now, just click here to be taken to that guide. Follow it from Step 5 on.
Download Bootra1n – Checkra1n for Windows
[adinserter block=”6″]Click here to be taken to the official bootra1n download site.
[adinserter block=”7″]
Click here to download the latest version of Rufus.
Subscribe to be Notified
Subscribe after downloading the bootra1n / checkra1n jailbreak. We’ll keep you in jailbreak loop and notify you any time there are new updates to the utility. You’ll be the first to know when the official Windows version is released.






Does this work on jailbreak 13.5.1?
Article states that it’s for iOS 13.6 but it’s only good on iOS 13.5. What’s the deal??
You have to enable untested versions in the options section of checkra1n.
Now states that iOS 13.5.1 is not compatible. Any help?
Dady toque iphone XR 13.4.1 A12 -A13 Jailbreak is not released yet ..Lol
Memmap is disabled
Could you please help me how can I fix it
Am trying to jailbreak iPhone XR iso 13.4.1
*boots in to Linux natively*
Look guys, Windows is on my hard drive therefore everything I boot is Windows! I’m tech savvy!
Really though, that does detract considerably from your credibility as an authoritative source in what or what not to boot up.